


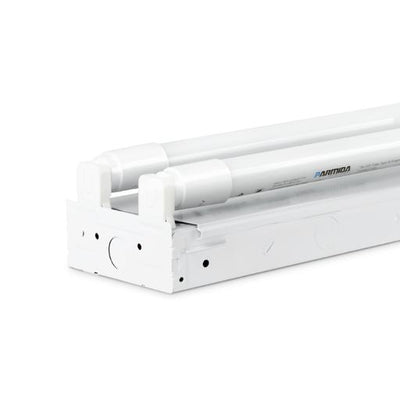


How to Bypass A Ballast
Upgrading your lighting is an exciting home project and most often, its completion ticks off a huge bullet point on your to-do list. While this can be a relatively simple task once you decide on your lighting plan, there is one last step: installation. Parmida LED lighting products feature easy-installation methods; however, a daunting task involved in any lighting installation is bypassing the ballast.
Hire A Licensed Electrician to Help

First and foremost, whenever doing any electrical or lighting installation, including but not limited to rewiring or direct-wiring, it is important to hire a certified electrician to ensure proper installation and the safety of your lights.
If you’re interested in learning the process of how to bypass a ballast, then check out our guide below!

Step 1: Disconnect All Power So There is No Electrical Current
Before beginning anything, you must ensure that the source of electricity to your light(s) is completely off and it is not connected to a power source. Turning the light switch off will not disconnect the connection to electricity; you must disconnect from power by finding your breaker (in your electrical panel) and toggle the breaker switch to the “off” position. This is first step in remaining safe when installing new lights.Step 2: Find the Ballast
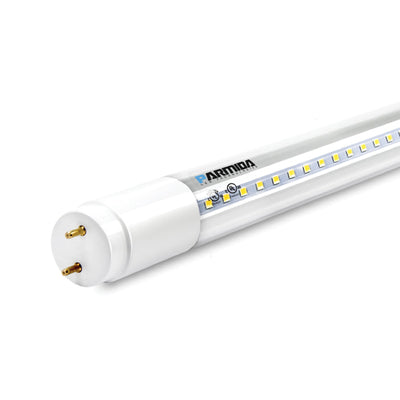
In order to bypass the ballast, you will first need to find the ballast on your fixture and remove the covering to properly access the ballast.Step 3: Locate and Cut Only the Hot and Neutral Wires
The first step is to cut the “hot” wire. A “hot” wire is also known as a “live” wire because it connects power to the light fixture. Most often, the “hot” wire will wrapped in either black or red. Next, you will need to cut the “neutral” wire. The “neutral” wire is the wire that allows for the electrical circuit to be completed and connect back to the electrical panel. This wire does not carry power but instead completes the circuit. Typically, this wire will be white. When cutting the wires, a good rule of thumb to follow is to cut approximately 2 inches away from the ballast. However, make sure the wires that exit the fixture remain long so you have ease and flexibility when attaching to the main power lines.Step 4: Cut the Socket Lead Wires
When doing this next step, you will need to look for the wires most often covered in red and blue. These are the socket lead wires and they allow power to reach the light. You can find these wires on the opposite side of the ballast. These wires connect to the wires that exit the ballast and go into the sockets. When cutting these wires, you can also follow the 2-inch rule of thumb mentioned above in Step 3, with the side that’s connected to the ballast. Sockets are also known as tombstones, and Parmida LED Tubes allow you to perform this connection on either shunted or non-shunted sockets.Step 5: Remove the Ballast (if you wish)
Once you have disconnected the ballast from its wires by cutting them, you will be able to successfully separate the ballast from the fixture. You remove the ballast altogether by unscrewing it from the fixture, or you can move it over and tuck it into the fixture with its remaining wires. You can also just keep the ballast in its original position.Step 6: Connect the Wires
Now that you’ve completed the steps to remove the ballast, you can begin the steps to connect your wires. In this step, you will have to connect the input wires to the output wires to complete the full circuit connection. Locate the input hot wire (black or red) and strip approximately one inch of the colored tube off it. Then do the same with the output hot wire, the output neutral wire, and the input neutral wire (white). *Make sure you only use one neutral wire coming from your power source. You will have to identify these input wires that are connected to the main power source and connect them to their respective output wires that are connected to the light fixture. Connect the neutral wires to one side of the fixture, and the hot wires to the other side. If you do not have non-shunted sockets (tombstones), make sure you do not connect hot wires and neutral wires to the same one side of your fixture. If you do have non-shunted sockets (tombstones) you may connect hot and neutral wires to the same side of the fixture. In this scenario, make sure no wires are used on the other side of the fixture.Step 7: Reattach Any Coverings and Turn On
After connecting your wires, you can return any coverings or lenses to their place on the fixture, turn the breaker back on, and switch on your light.Enjoy Your New Lights and Your Savings
Even though Parmida LED offers an easy-installation process of your lights, it’s important to leave it to the professionals to ensure safety. By bypassing the ballast on your T8 Tubes, you will reduce troubleshooting issues if your lights ever have an issue. Additionally, because ballasts eventually fail over time, removing and bypassing the ballast when installing your new lights guarantees a longer lifespan, since direct-wiring LEDs is significantly more energy-efficient. For more reasons why we recommend bypassing the ballast ono your T8 tubes, look here. To learn more about tube installation and single and dual-ended connection, check out our guide. The energy-efficiency and long lifespan of your LED tubes will be a great time, cost, and energy-saver.
Leave a comment